Packaging and Deployment
13.1 Introduction
In this book, many different stand-alone browser extensions were described, along with extensions that also required additional API servers and databases. As each of these solutions was set up to run in a local environment, this chapter guides you through the setup and migration of all your developed solutions to cloud hosting platforms.
This chapter begins in Section 13.2 by describing the process of setting up a custom cloud-based MongoDB database using the MongoDB Atlas platform. Once a cloud database has been set up, Section 13.3 describes the process of using MongoDB Compass to test the connection before integrating it into an API Server. Section 13.4 then describes the process of migrating JSON MongoDB records from a local server to a cloud-based server. Once the server has been set up, Section 13.5 outlines the process of updating an API server to use the new cloud database. To store the API server's source code before deployment, Section 13.6 describes using GitHub Desktop to manage a code repository.
To make the API server accessible to the public, Section 13.7 discusses the process of deploying your API server to a cloud-based server using DigitalOcean's App Platform. To package an extension to provide to other users, Section 13.8 describes the built in Chrome extension packing tool. To conclude this chapter, Section 13.9 provides a list of core takeaway tips.
Source code for this chapter can be found here.
13.2 Creating a Cloud Hosted Database
Earlier in this book, the process of setting up a local MongoDB database was described, and MongoDB Compass was used for creating, editing, and viewing the records. Although this approach is great in a local development environment, to allow your extension to be used by other people, database migration is required. This section reviews the process of creating a cloud-based MongoDB database on the cloud service provided by the creators of MongoDB, titled MongoDB Atlas.
To get started, head to the homepage of MongoDB Atlas https://www.mongodb.com/atlas. On this site, we first need to sign up for a new account by clicking on the Get Started button as shown in Figure 13.1, which will bring us to the register page.
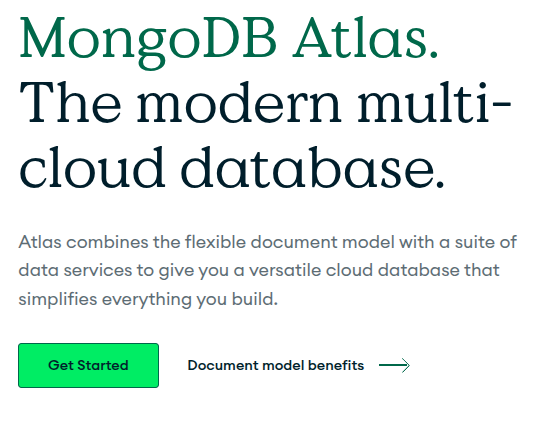
Figure 13.1: MongoDB Atlas - Website homepage.
Once loaded, sign up for a new account as shown in Figure 13.2, and click Create your atlas account.
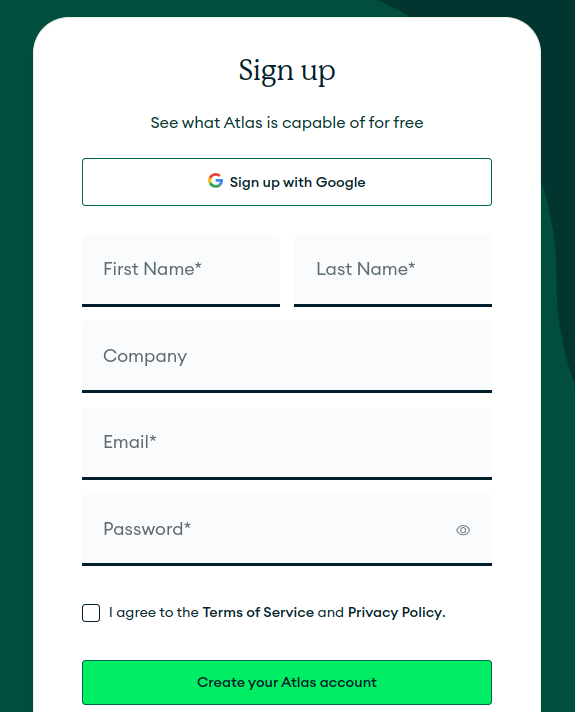
Figure 13.2: MongoDB Atlas - Account sign-up page.
After you have completed the registration, an email will be sent to your address to validate the account, as shown in Figure 13.3.
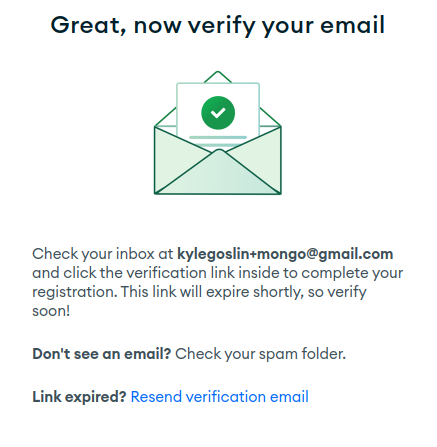
Figure 13.3: MongoDB Atlas - Instructing the user to check for a verification email.
When your email has been validated, the website will then ask to collect basic information about what you are going to use the database for, as shown in Figure 13.4. Fill out the basic information and then click Finish.
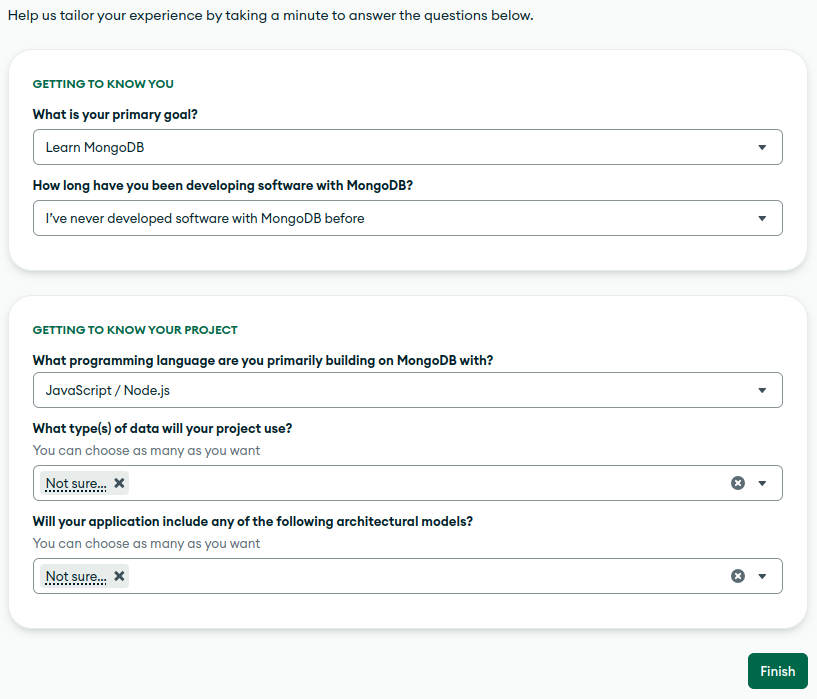
Figure 13.4: MongoDB Atlas - Asking for basic statistics about your usage.
Once the new account has been created, we are then brought to the dashboard as shown in Figure 13.5. Here, it offers the option to decide what type of cluster we would like to deploy. A cluster is the default name for a collection of databases on MongoDB. The core objective here is to outline how much power we wish the cluster to have. As this is a demo, we will select the option on the right side titled Free as it has more than enough resources for the demo. At the end of this process, click Create Deployment.
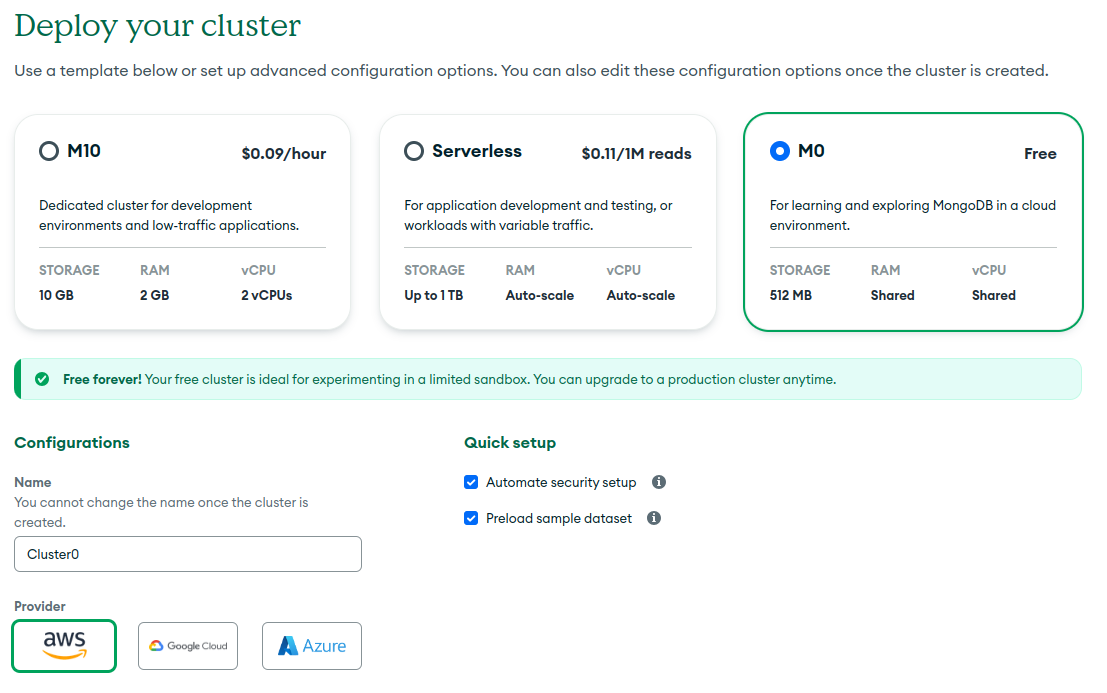
Figure 13.5: MongoDB Atlas - Creating your first database cluster.
Figure 13.6 shows the window that will open the first time the database dashboard is opened. This shows you the username and password for the database you are creating. Store this username and password in a safe place for the future. Click Create database user.
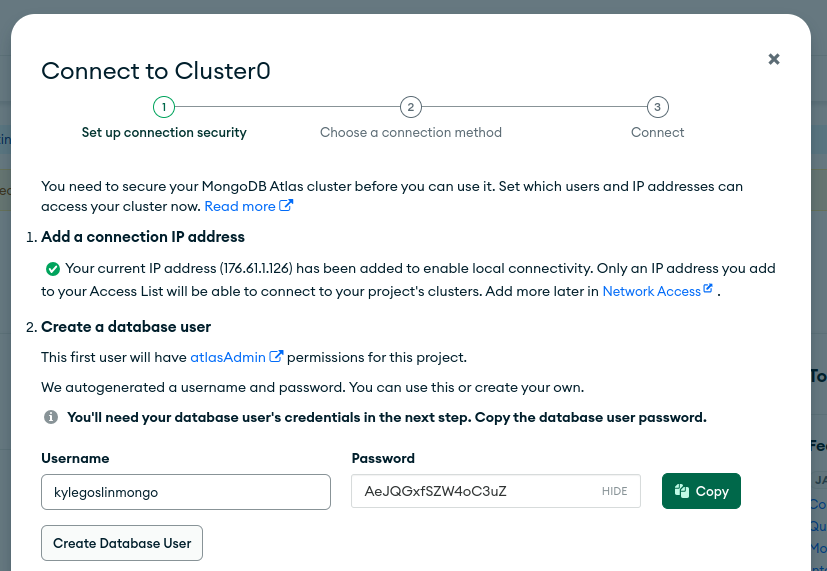
Figure 13.6: MongoDB Atlas - Creating a new user account for a database.
Finally, we need to decide how we wish to connect to the database. To do this, click Choose a connection method as shown in Figure 13.7. A window will then open showing you a variety of different methods for connecting to your database. In this example, we will click Drivers as we are going to use code to work with the database instead of a traditional client tool.
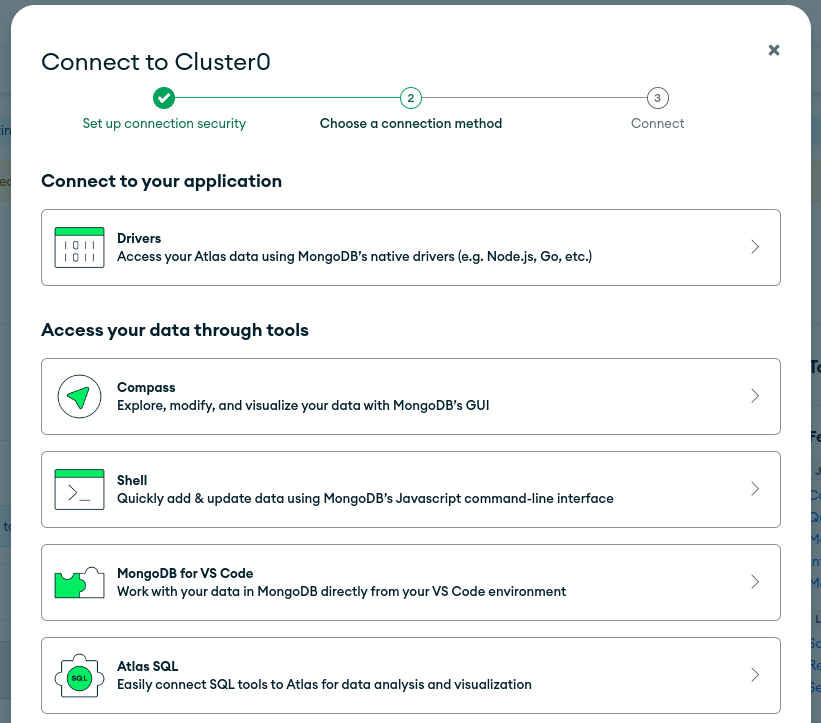
Figure 13.7: MongoDB Atlas - Selecting the database connection method.
Once the connection method is selected, the command and connection string are available as shown in Figure 13.8. In this window, you will then see the steps involved to get your API server to interact with the cloud database. The first of these is to select the version of Node.js we are using. The last step is to gather the connection string URL that we are going to use to get our API server to work with this cloud database. Be sure to save this connection string for later steps.
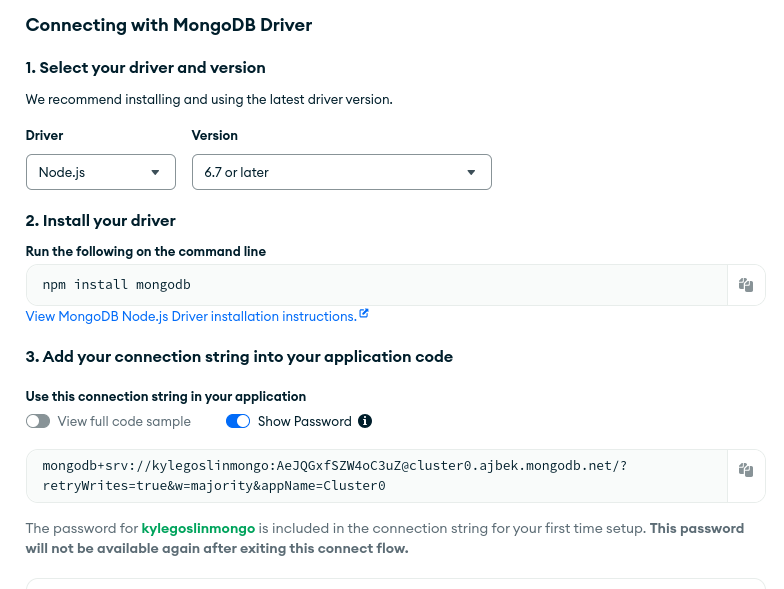
Figure 13.8: MongoDB Atlas - Database driver and connection string.
When viewing the connection string, we can break it into three core parts: 1) username, 2) password, and 3) database URL and port. It is important to remember here that the user account you use to log in to the MongoDB Atlas dashboard is not the account that is used for your API server to interact with a cloud database. The user account we use here is the user account previously created for the database.
In the example below, the username for this database is first added as kylegoslinmongo. After the colon, the password is also added, here shown as AeJQGxfSZW4oC3uZ. The last element of the connection string is the URL where the database is hosted. This appears after the @ sign in the connection string. In this example, it is set to cluster0.ajbek.mongodb.net/?retryWrites=true&w=majority&appName=Cluster0. A sample connection string for a MongoDB Atlas database can be seen below. The connection string for your database will have its own username, password, and URL.
mongodb+srv://kylegoslinmongo:[email protected]/?retryWrites=true&w=majority&appName=Cluster0
When we have saved the username, password, and connection string locally, we can move on to the next step by clicking Done in the bottom corner. We will then be brought back to the dashboard, showing you your new cluster. Here we have the two main options required when working with the database: Connect - when we wish to have the connection options available to us again,and Browse collections, where we can take a look inside the database at the individual collections in the database. To view these, click Browse collections to open the databases as shown in Figure 13.9.
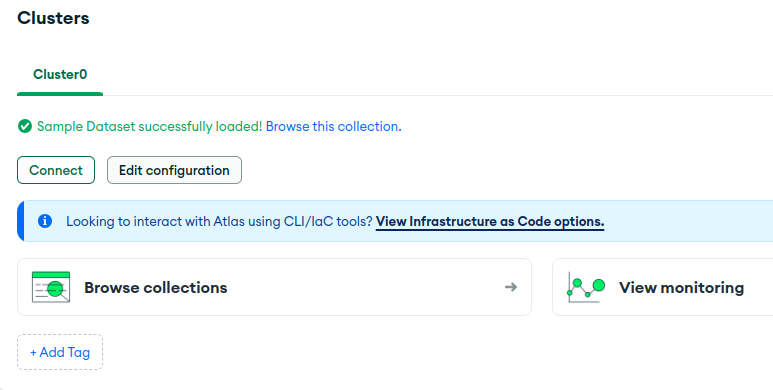
Figure 13.9: MongoDB Atlas - Button titled Browse Collections to view all the databases and collections.
When the page loads, we will see a list of the sample collections in the database. As we wish to create our own database, click Create database as shown in Figure 13.10.
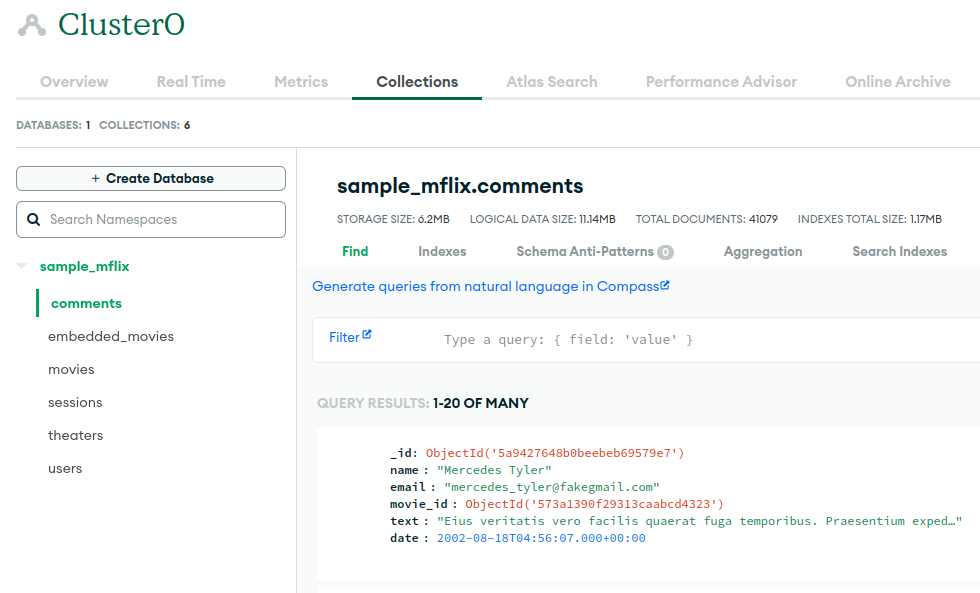
Figure 13.10: MongoDB Atlas - Create database option shown on the left of the page.
In the window that opens as shown in Figure 13.11, we can enter the name of the database we wish to create, and the name of the collection we wish to add to the database. Here newdatabase is added for the database name, and login is added as the collection. After these values are set, click Create.
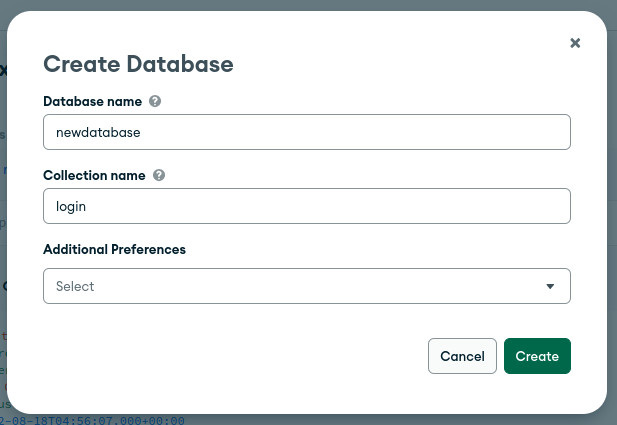
Figure 13.11: MongoDB Atlas - Entering a new database and collection name.
Once created, the new database titled newdatabase, and the collection titled login we created inside it are visible as shown in Figure 13.12.
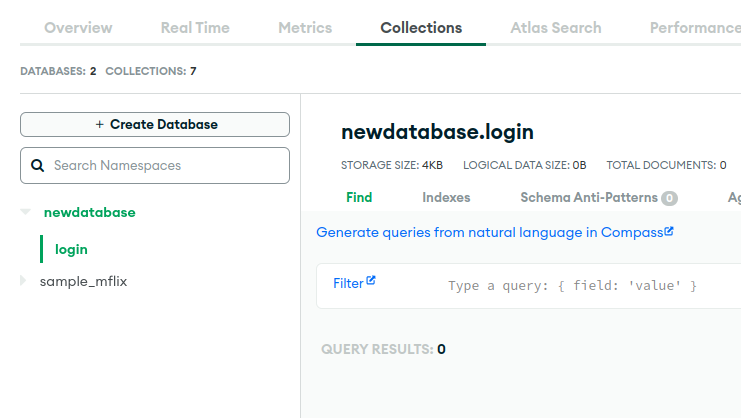
Figure 13.12: MongoDB Atlas - Viewing the new database and collection.
As we now have a collection, to add a new record into the collection, we can click Insert Document on the right-hand side of this dashboard as shown in Figure 13.13.
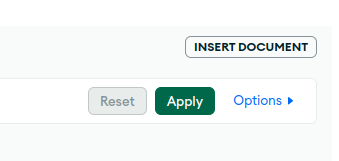
Figure 13.13: MongoDB Atlas - Inserting a new record into the database collection.
On the right of the window that opens, we can click the two brackets icon to enter JSON mode. Here, we can then add a new sample JSON record into the input field. In this example, two attributes are added email and pass. The ID attribute is not required during this process and will be created automatically. After the JSON has been added, click Insert to add the record as shown in Figure 13.14.
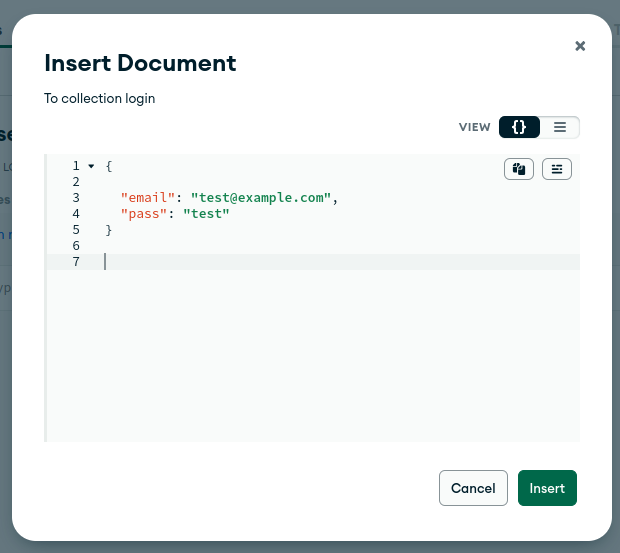
Figure 13.14: MongoDB Atlas - Adding the JSON record content.
As we now have a sample record in our database and all the details required for connecting to the database, we can review access to the database. By default, the database does not allow any external IP addresses to connect to it, e.g., database clients or API servers. During development to fix this, we can simply head to the dashboard and on the left-hand side column, click Network Access as shown in Figure 13.15.
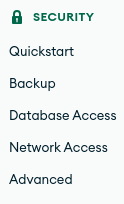
Figure 13.15: MongoDB Atlas - Network Access button to review what IPs can connect to the database.
In the window that opens, the IP addresses of the machines that are allowed to connect to the database are listed. As we wish to allow all connections from any IP during development, click Add IP address on the top-right as shown in Figure 13.16.
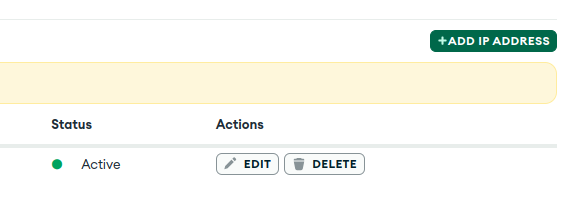
Figure 13.16: MongoDB Atlas - Whitelisting the IP address that can connect to the database.
Here we will add the wildcard address 0.0.0.0/0 to the Access List Entry field to allow all connections as shown in Figure 13.17. To finish, click Confirm.
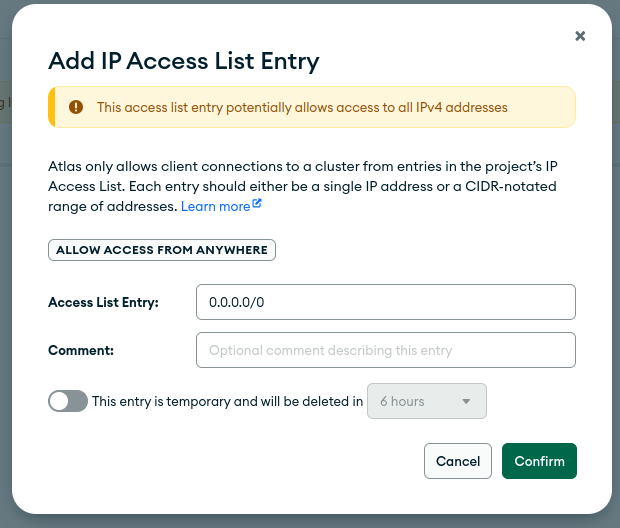
Figure 13.17: MongoDB Atlas - Adding a wildcard to allow all IPs to connect to the database.
In the future, if the username and password for connecting to the database are ever lost, new ones can be created by clicking on Database Access on this same menu on the left-hand side of the dashboard. Although in this example we have created a simple database with a collection that contains a single record, this process can be repeated to create any of the collections and records that were described in earlier chapters.
13.3 Testing the Cloud Database Connection
When a database has been created in the cloud, the final step in the process is to ensure that it can be accessed. A simple method of ensuring that your database is public is by downloading the MongoDB client tool titled MongoDB Compass (https://www.mongodb.com/products/tools/compass). Compass is a database connection client with a minimal user interface. Depending on your operating system, it can be downloaded from their website. (https://www.mongodb.com/try/download/compass)
The installation process of Compass is very minimal, simply adding the tool to your program files. It is important to remember that during the process of setting up your database or making modifications to it, any changes you make may take a few minutes to reach the server. If the username, password, and URL of the database are correct, simply waiting a few minutes may solve the connection issue.
When Compass first loads, the dashboard is presented as shown in Figure 13.18. On the left-hand click on the button titled Add new connection.
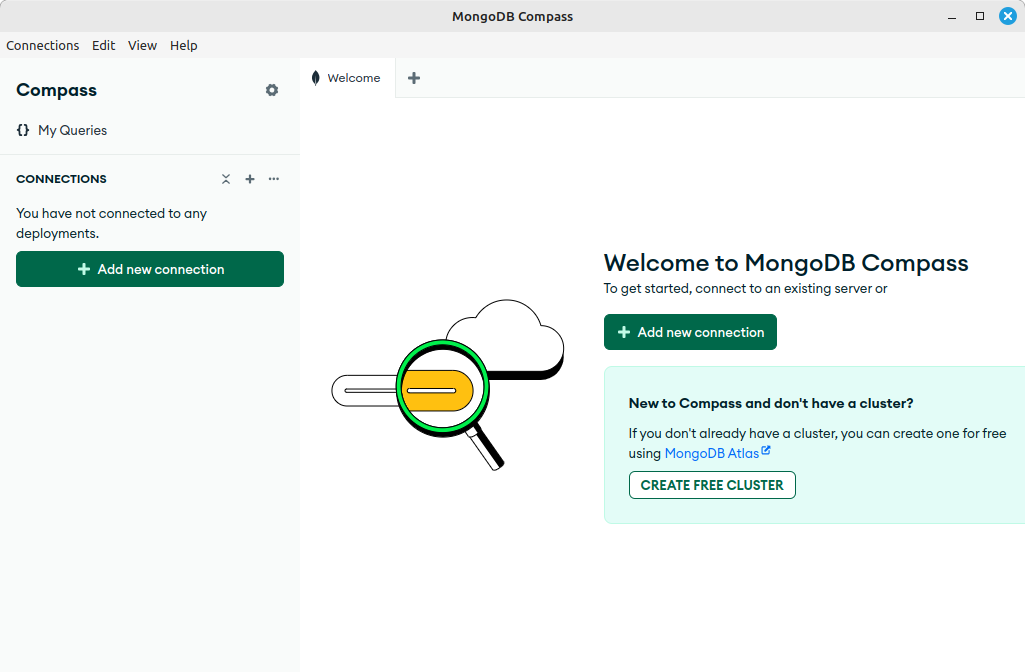
Figure 13.18: MongoDB Compass - Adding a new connection button shown on the left.
Figure 13.19 shows a connection dialog is then shown, where the complete connection string URL for the database can be added. When this is complete, click Save and Connect.
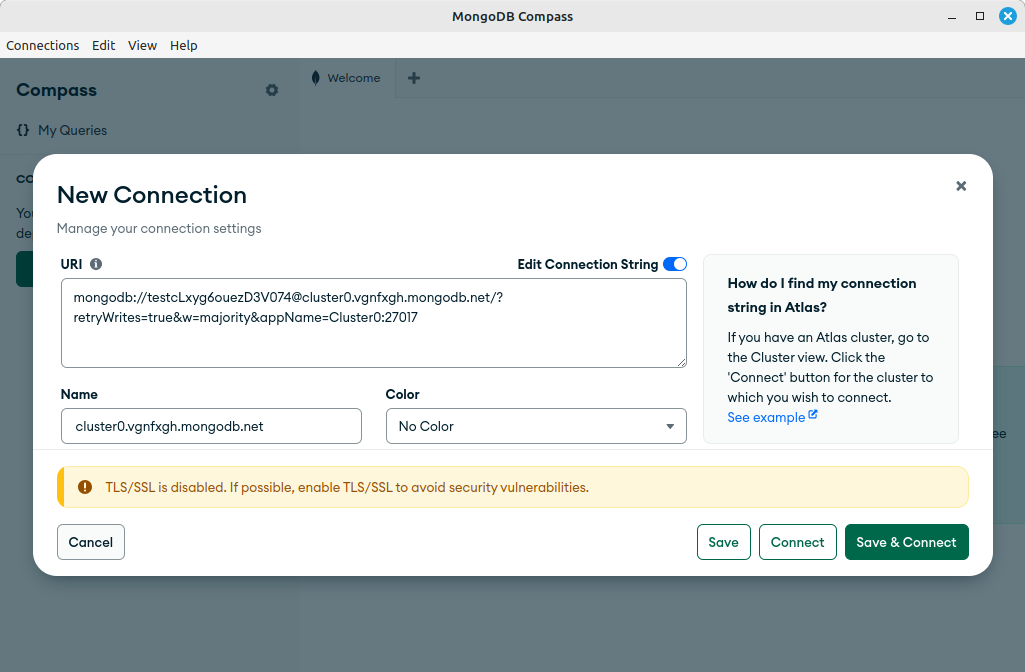
Figure 13.19: MongoDB Compass - New connection dialog where the database connection URL is added.
In Figure 13.20, on the left-hand side, we can see the databases that we created using the MongoDB Atlas dashboard in the previous steps.
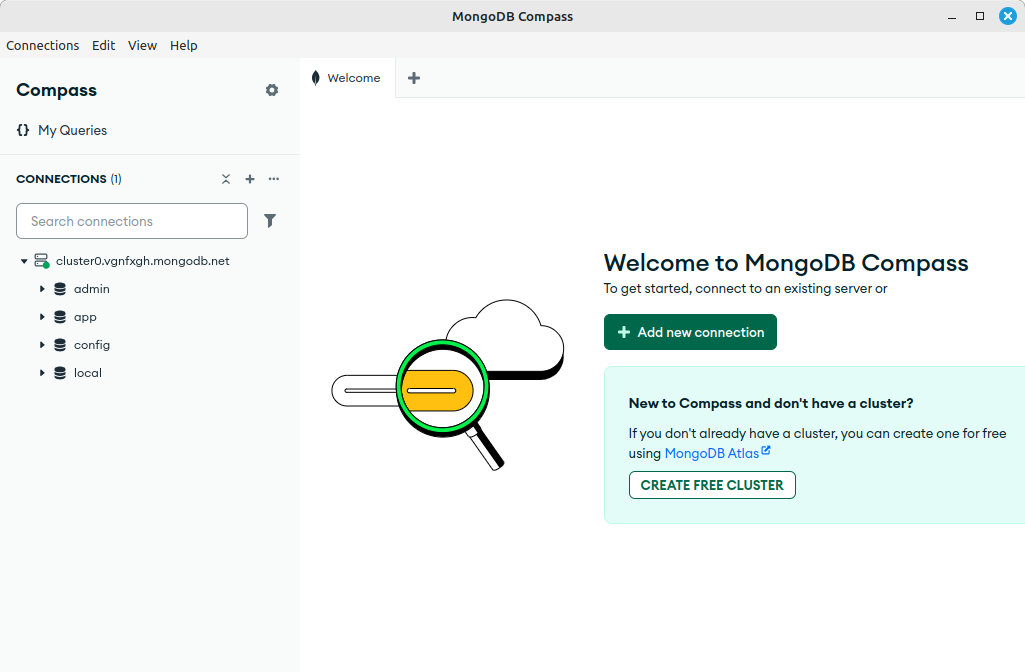
Figure 13.20: MongoDB Compass - List of databases that were previously created.
To explore a collection of records, simply click on the collection name, and a list of JSON records in the individual collection is listed, as shown in Figure 13.21.
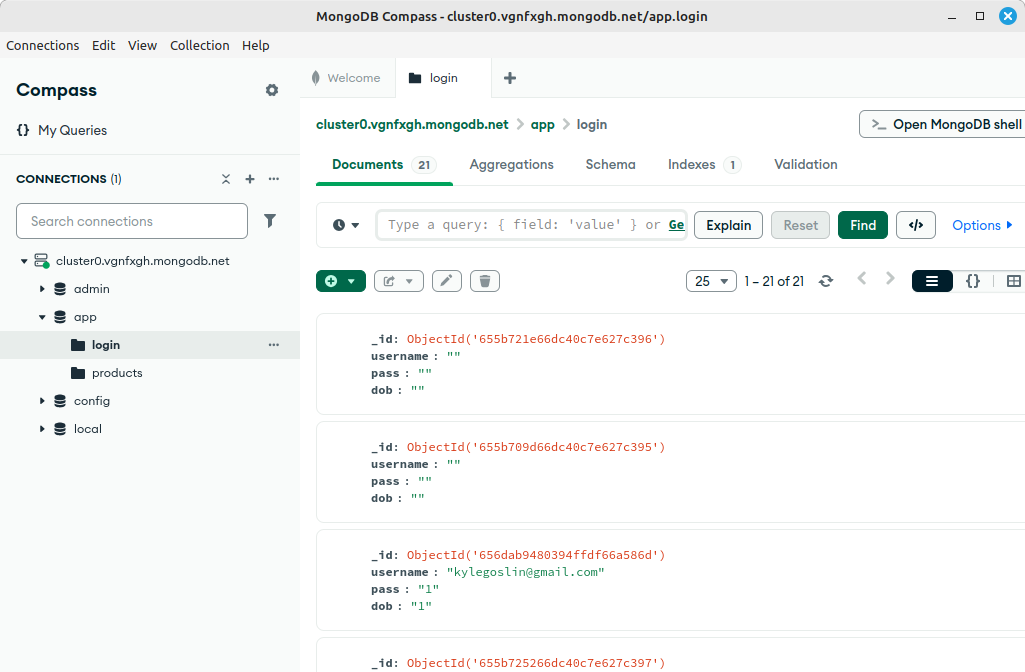
Figure 13.21: MongoDB Compass - List of individual JSON records in a database collection.
When viewing individual records in a collection, a mouse can be hovered over a single record to view the Edit button as shown in Figure 13.22.

Figure 13.22: MongoDB Compass - Hovering on a single record to view the edit button.
Once clicked, a new dialog will open allowing you to edit the single JSON record, as shown in Figure 13.23. Here, the individual attributes and values for the record can be edited. Once finished, click Update.
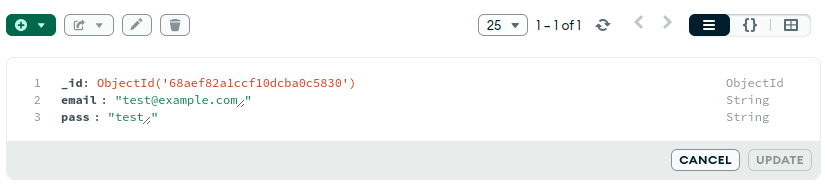
Figure 13.23: MongoDB Compass - Editing a single JSON record.
Many of the examples in this book used a MongoDB database, but did not require any of the JSON records to be created before the extension was used. In these cases, we can simply create the correct database name and collection name for the extension, and the JSON records will be created automatically by the extension when interacting with the associated API server. In the cases where you wish to move existing data, Section 13.4 discusses this process.
13.4 Database JSON Records Migration
When moving to a cloud environment, we create a new database to replace the local database. In this example, we will review the process of exporting two JSON records contained in a MongoDB database collection and importing them into a cloud database. To begin, we first open MongoDB Compass and connect to the local database at localhost:27017 as shown in Figure 13.24. Once loaded, we identify the database we wish to export, which in this case is a database titled olddatabase. Inside this database, a single collection titled login is shown, which contains two JSON records.
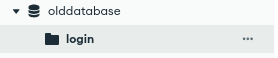
Figure 13.24: MongoDB Compass - Viewing a database we wish to export.
When viewing the records, beside the green plus sign, click the Export button, which opens a menu. In this menu, click Export this full collection as shown in Figure 13.25.
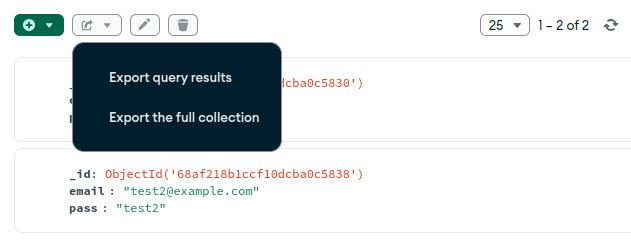
Figure 13.25: MongoDB Compass - Export button beside the green plus sign.
Figure 13.26 shows this dialog that opens. On this, click JSON, followed by Export to begin the export process.
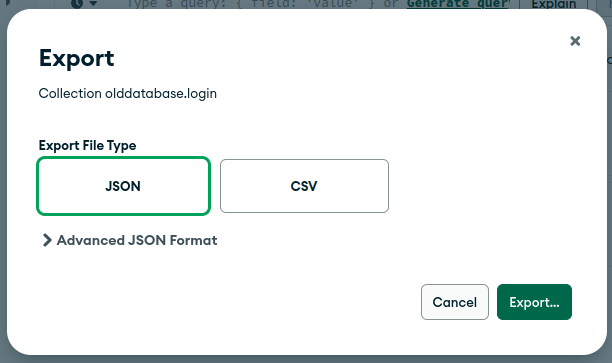
Figure 13.26: MongoDB Compass - Setting the collection export settings.
A save dialog will then open, allowing you to save the JSON title titled olddatabase.login.json. In this name, we can see that olddatabase was the database name, and login was the name of the collection. Once this file is saved, open the file using a text editor, and you will see the two JSON records along with their attributes as shown below:
[
    {
        "_id": {
            "$oid": "68aef82a1ccf10dcba0c5830"
        },
        "email": "[email protected]",
        "pass": "test"
    },
    {
        "_id": {
            "$oid": "68af218b1ccf10dcba0c5838"
        },
        "email": "[email protected]",
        "pass": "test2"
    }
]
As the JSON for the collection is now self-contained as a single file, we can begin the process of importing it into the new cloud database. Open MongoDB Compass and connect to the cloud database that was created earlier. Once loaded, click the plus sign that is visible when a cursor is placed over the cloud database URL, as shown in Figure 13.27.
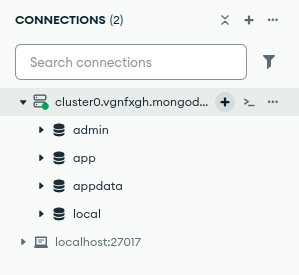
Figure 13.27: MongoDB Compass - Viewing both databases.
In the dialog that opens, enter newdatabase as the database name, and login as the collection. Once finished, click Create Database.
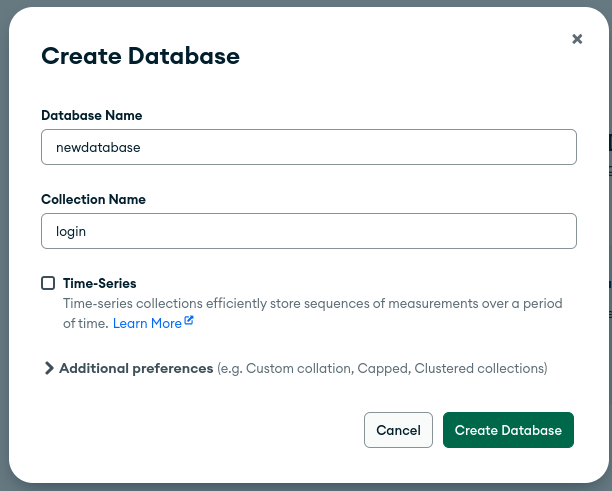
Figure 13.28: MongoDB Compass - Creating the new database.
Once the new database is created, click the green Add Data button as shown in Figure 13.29. A menu will then open where we can then click Import JSON or CSV file.
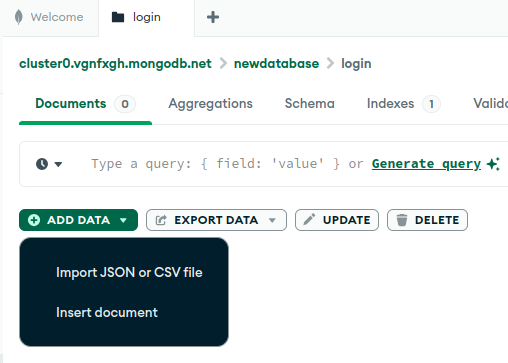
Figure 13.29: MongoDB Compass - Clicking add data to load a JSON file.
A file browser will then open, allowing you to select the JSON file that was previously exported. When the file is selected, Compass will then provide a summary of the proposed import as shown in Figure 13.30. When finished, click Import.
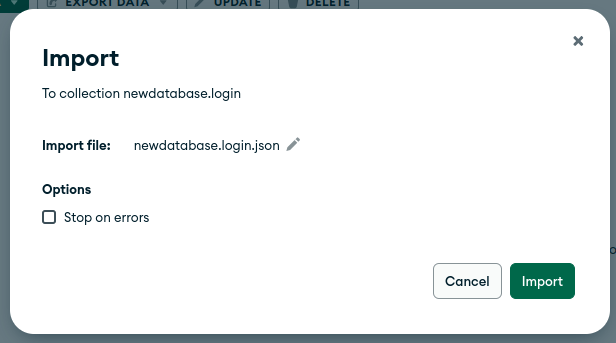
Figure 13.30: MongoDB Compass - Reviewing the import.
The JSON contained in the file is then imported into the collection as shown in Figure 13.31.
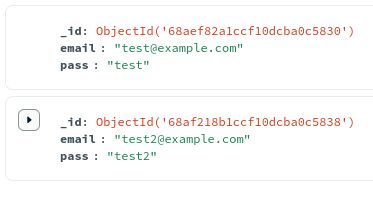
Figure 13.31: MongoDB Compass - Viewing the imported JSON records.
This method of moving a local database collection to a cloud database collection can be done through the export and import process. This process can also be used just to export data from a database collection to serve as a backup copy of live data.
13.5 API Server Cloud Database Integration
Once the cloud database has been set up and tested using MongoDB Compass, we can begin the process of integrating it with a sample API server. To get started, create a new folder titled apiserver-database and insert a copy of the Express.js API server from Chapter 4, Section 4.4 Custom API Server, or from the GitHub repository shown below.
File Structure
-
/apiserver-database/bin/
-
/apiserver-database/node_modules/
-
/apiserver-database/public/
-
/apiserver-database/routes/
-
/apiserver-database/views/
-
/apiserver-database/app.js
-
/apiserver-database/package.json
Source code: /ch13/apiserver-database/
Before proceeding with this example, ensure you have set up a MongoDB Atlas cloud database and have the URL of the database, along with the username and password for the database account. When these are available, ensure you have set up a new database titled newdatabase and a database collection titled login. If not, please head to Section 13.2 before proceeding.
Inside the /routes/ folder of the API server code, a file was created titled api.js which had all the URLs for the API server defined. The first of these was the / (forward slash) URL that returned a simple message. After this, another route is added titled /getData.
Inside this route, the boilerplate MongoDB connection code is first added. In this code, we can see a variable title uri is added with the address mongodb://localhost:27017. This was used throughout this book as we were working with a local MongoDB database. A new MongoClient is then created, and the uri address variable is passed in. When this is created, it is placed into a variable titled client.
var express = require("express");
var router = express.Router();

/* GET users listing. */
router.get("/", function (req, res, next) {
  res.send("The API was called!");
});

// getData
router.get("/getData", function (req, res, next) {
  console.log("/getData call success");
  const { MongoClient } = require("mongodb");
  const uri = "mongodb://localhost:27017";
  const client = new MongoClient(uri);
After this, a new function titled run() is added, which performs the actual query to the database. In this, a try-catch block was added to try query the database and catch the result if the connection failed. Similar to previous examples, the client.db() syntax was used to select the database by name, which in this case is titled newdatabase. After this, the collection() function is used to select the login function.
The core query can then be run, which in this case is the findOne() function, which is passed the query JSON that defines we are interested in finding the record where the email attribute is set to [email protected]. When found, the res.json() function is used to send back the record rec to the API.
  async function run() {
    try {
      const database = client.db("newdatabase");
      const user_records = database.collection("login");

      const query = {
        email: "[email protected]",
      };
      const rec = await user_records.findOne(query);

      console.log(rec);
      res.json(rec);
    } finally {
      await client.close();
    }
  }
  run().catch(console.dir);
});

module.exports = router;
To allow this code to interact with the new cloud database instead of the local database, a small modification is made to the uri variable to define what database address we wish to connect to. In this example, we add the address of the cloud database, along with the username and password for the cloud database account we created earlier. Below, highlighted, this new URL can be seen.
var express = require("express");
var router = express.Router();

/* GET users listing. */
router.get("/", function (req, res, next) {
  res.send("The API was called!");
});

// getData
router.get("/getData", function (req, res, next) {
  console.log("/getData call success");
  const { MongoClient } = require("mongodb");
  const uri = "mongodb+srv://kyle:[email protected]/";
  const client = new MongoClient(uri);

  async function run() {
    try {
      const database = client.db("newdatabase");
      const user_records = database.collection("login");

      const query = { email: "[email protected]" };
      const rec = await user_records.findOne(query);

      console.log(rec);
      res.json(rec);
    } finally {
      await client.close();
    }
  }
  run().catch(console.dir);
});

module.exports = router;
Now that we have the database set up correctly and the JavaScript in the api.js file is set up to point to the new cloud database, we can open a command prompt in the root of the project and run the API server with the following command:
DEBUG=myapp:* npm start
We can then open a browser and head to the API server URL http://localhost:3000/api/getData. When this URL is opened, if the connection to the database is successful, a single record should be returned from the cloud database collection, similar to the one shown below:
{
    "_id": "68aef82a1ccf10dcba0c5830",
    "email": "[email protected]",
    "pass": "test"
}
If no data is returned here, be sure to check your MongoDB Atlas database, and ensure that the single record shown above has been added to the login database collection this code calls.
13.6 GitHub Source Code Management
A core element of the extensions described in this book was the additional API server that was used to send and receive between the extension and the database. Although it worked well for local development, it was not public for other users. In this section, we will review the process of migrating your local API server to a cloud-based server. The first step in this process is to move the local API server code to a git repository.
Git offers us the ability to keep track of the changes we make to the source code, but it can also be used as a storage location for the code which can be used as a source for a cloud hosting platform to pull from. To get started, make a copy of the code from the previous section that interacted with the MongoDB Atlas cloud database, or make a copy of the code listed in the code repository below.
File Structure
-
/apiserver-database/bin/
-
/apiserver-database/node_modules/
-
/apiserver-database/public/
-
/apiserver-database/routes/
-
/apiserver-database/views/
-
/apiserver-database/app.js
-
/apiserver-database/package.json
Source code: /ch13/express-cloud/
The simplest method of adding code to a git repository is by using GitHub.com. This service offers both a location to put the code externally and a GUI tool to perform these actions. To get started, head to www.github.com and sign up for a new account. Once your new account has been created, we will then navigate to https://desktop.github.com/download/ to download a tool titled GitHub Desktop. This is a simple GUI application allowing you to see the repository you have created and make changes to it. Download this application and install it on your machine. Once installed, we can head to your system's Program Files and click on GitHub Desktop. When the application launches, you will see the dashboard as shown in Figure 13.32. Click the Sign in button to begin authentication.
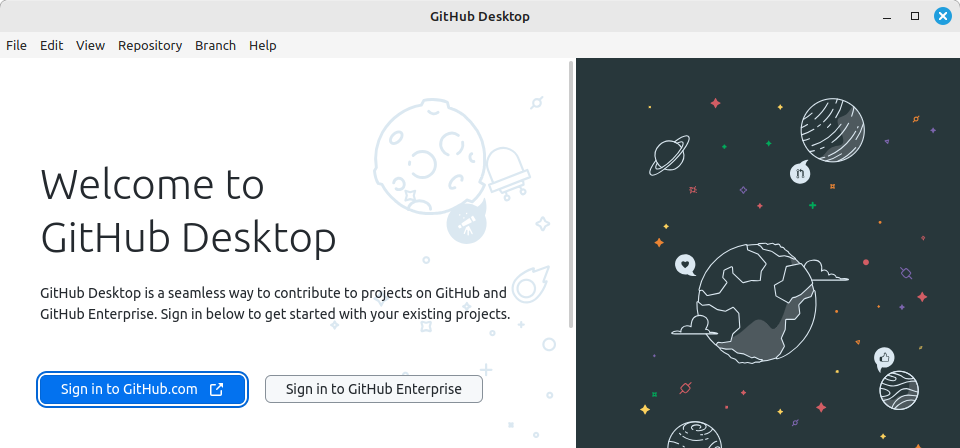
Figure 13.32: GitHub Desktop - Client dashboard.
You will then be brought to the GitHub.com authorization page as shown in Figure 13.33. On this page, click Authorize desktop. It will then prompt you to enter your credentials. If this is successful, you can return to the application and click Finish.
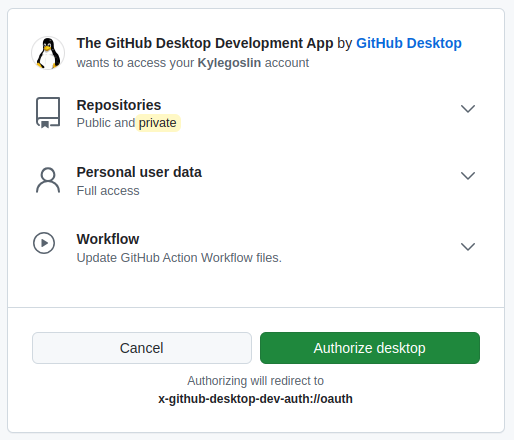
Figure 13.33: GitHub Desktop - Dashboard authentication.
Once you have signed in, we then begin the process of creating a git repository to hold the API server's source code on GitHub. To do this, on the top of the application, click File > Create new repository as shown in Figure 13.34.
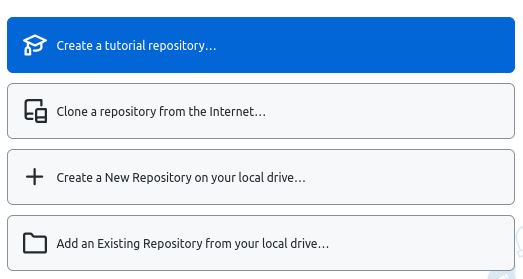
Figure 13.34: GitHub Desktop - Creating a new repository.
In the window that opens, as shown in Figure 13.35, we will set a name for the repository, and also set the path to the repository. Here we select the location where we wish our new empty folder will be located, which is treated as a repository. To finish, click Create.
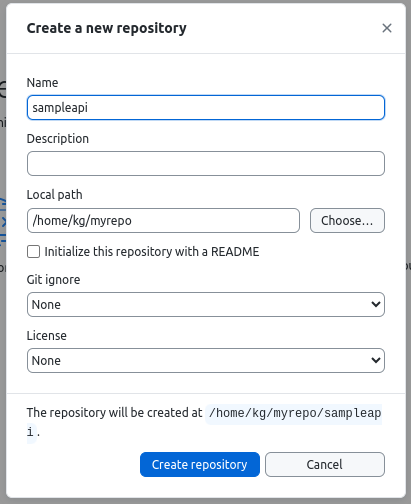
Figure 13.35: GitHub Desktop - Adding the new repository details.
Next, we need to move the files to the new location. Open a file browser, and open the folder that was created. Then, move the contents of the JavaScript Express.js API server we created earlier into this empty folder. After this, return to the application, and you will see that the application has detected that we added these new files, as shown in Figure 13.36.
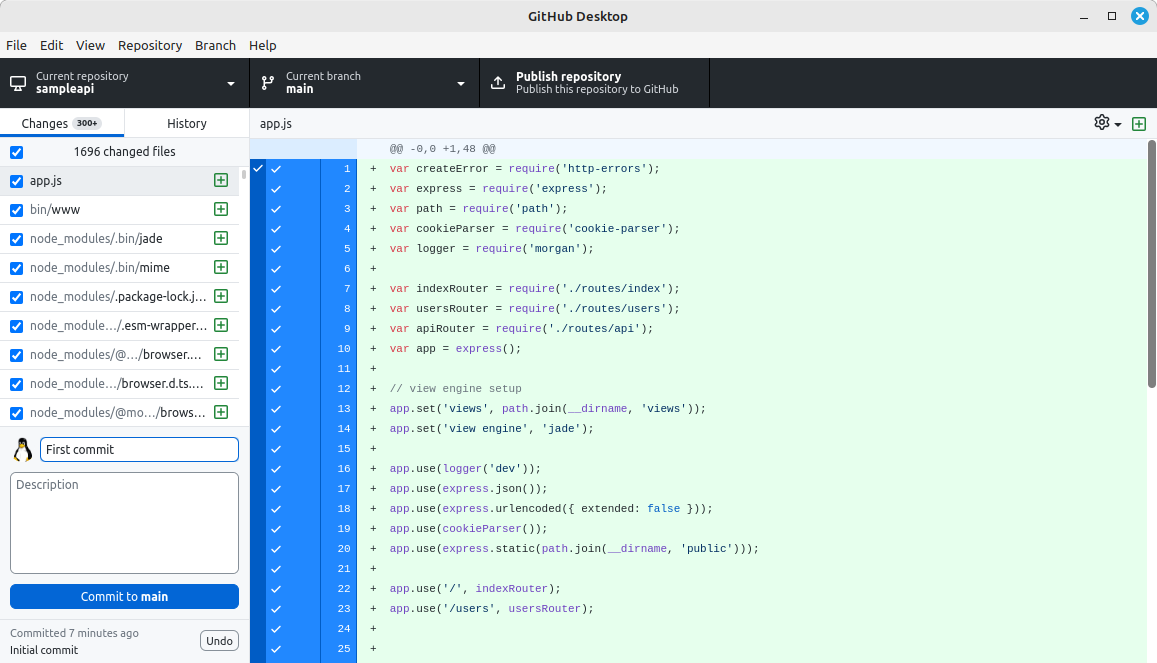
Figure 13.36: GitHub Desktop - New files being identified.
Once the code has been added, we need to perform an action called a commit. This commit process is saving all the changes that have just been made into the repository locally. To do this, we first need to add a message to the commit as shown in Figure 13.37. Once the message has been added, click Commit to save the changes. It is important to remember at this stage, although the changes have been saved using the commit, they are not yet visible on the GitHub server.
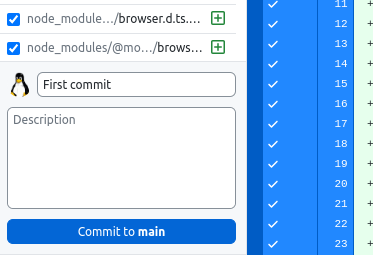
Figure 13.37: GitHub Desktop - Committing all the changes to save the progress locally.
Now that we have saved all the changes locally, we need to send the changes out to the GitHub server for storage. When the commit is finished, a button titled Publish repository is available, as shown in Figure 13.38. Click this button to finish.
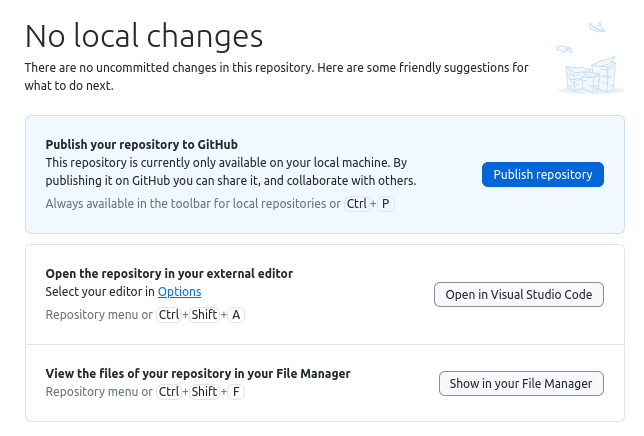
Figure 13.38: GitHub Desktop - Push command to send the changes to the GitHub server.
The final push step has now made all our JavaScript available on the external GitHub repository. At any stage, if we would like to see the progress we just made, we can open GitHub Desktop and click View > View on GitHub to open the online version of the GitHub repository. Figure 13.39 we can see all the files in our project on the GitHub repository website.
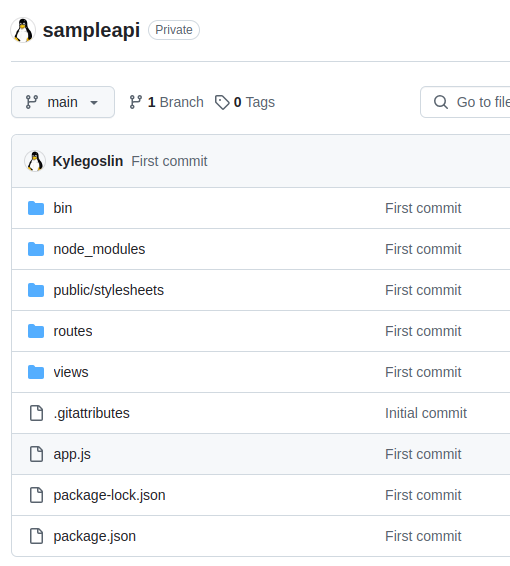
Figure 13.39: Viewing the online GitHub repository of our code.
In the future, whenever changes are made to the API server's code locally, we must use GitHub Desktop to keep track of this process. When changes are made to the code, GitHub Desktop will detect these changes and offer you the ability to commit the changes to save them locally. When this is complete, we can again repeat the push process to send the latest version of our local code to the online GitHub repository. As we now have an online repository of our code,we can begin the process of deploying the code in this repository on a cloud hosting platform. This process is described in Section 13.7.
13.7 DigitalOcean API Server Deployment
The hosting provider described in the following sections is DigitalOcean, a low-cost cloud hosting platform. The main difference between DigitalOcean and other cloud providers is the transparency in the billing process. Instead of attempting to gauge a number of smaller hourly bills for CPU/RAM and SSD usage, DigitalOcean provides one single monthly cost, which is reasonable for beginners.
DigitalOcean offers a number of different services for deploying an API server, each with different levels of complexity. When a developer wishes to have complete control over the application that they are deploying, the Droplet service can be used. A Droplet is a virtual machine with command-line access hosted on a cloud platform. The downside of this, however, is that the virtual machine may be missing many of the additional libraries we require, and it also requires you to manually configure the server yourself.
As a solution to this, as a quick deployment option, DigitalOcean offers a solution called the App Platform. This solution allows you to point to the location where your code lives (such as a GitHub repository), and, with a few clicks, deploy the server. This section describes this deployment process using the App Platform. Before we begin, sign up for a new account on the DigitalOcean website. Once your account has been created, log in to access the main dashboard. On the left side of this dashboard, each of the individual services DigitalOcean offers can be seen, as shown in Figure 13.40. On this side menu, click App Platform at the top.
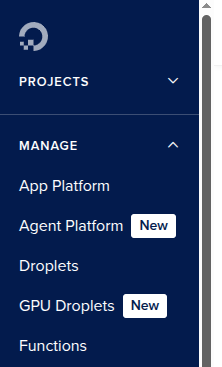
Figure 13.40: DigitalOcean - Main dashboard.
The App Platform will then open. The first step in this process is to connect the App Platform with the GitHub repository that contains the API server code we wish to deploy. On this first page, click GitHub as the provider as shown in Figure 13.41. As we have not yet authenticated with GitHub, it will prompt you to log in with your user account. After this, from the drop-down menu, we can select the code repository we created earlier in Section 13.6. Once the repository has been selected, click Next to continue.
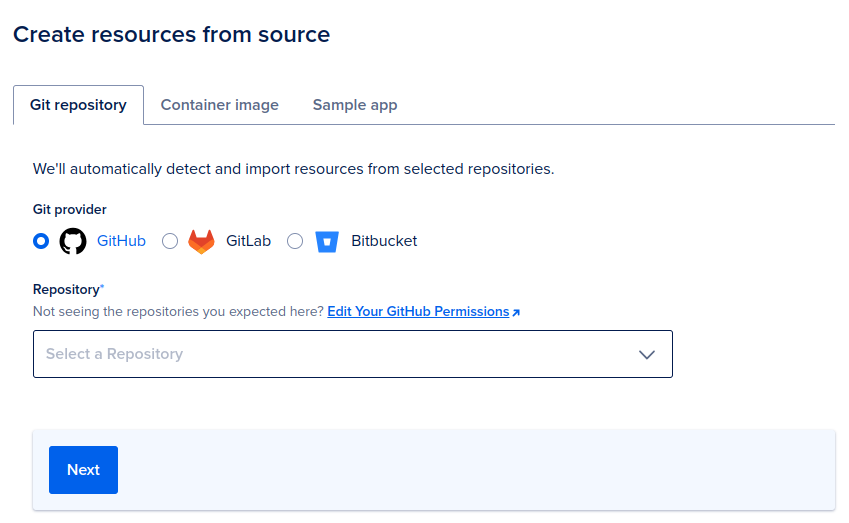
Figure 13.41: DigitalOcean - App Platform dashboard.
We then need to select the default branch where our code is located, as shown in Figure 13.42. As we have not created any branches, we will select the default main branch. As our code is contained in the folder, we leave the Source directory as its default value. At the end of this process, a simple box to tick is available titled Autodeploy. This is very useful, as in the future if we make changes to our code and push the changes to the GitHub repository, the DigitalOcean server will automatically pull the latest code from the repository and redeploy the application on its server. Click Next to move onto the next step.
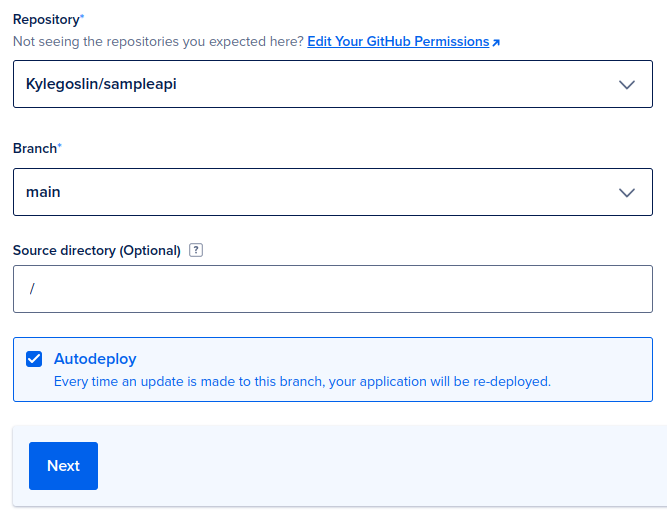
Figure 13.42: DigitalOcean - Selecting the repository branch.
We then have an option to review the virtual machine we are about to create, as shown in Figure 13.43. Here we can see that we have 1GB of RAM and 1 vCPU. In the future, if more computing power is required, we can click edit to upgrade the machine. As we do not need to make any changes, click Next to continue.
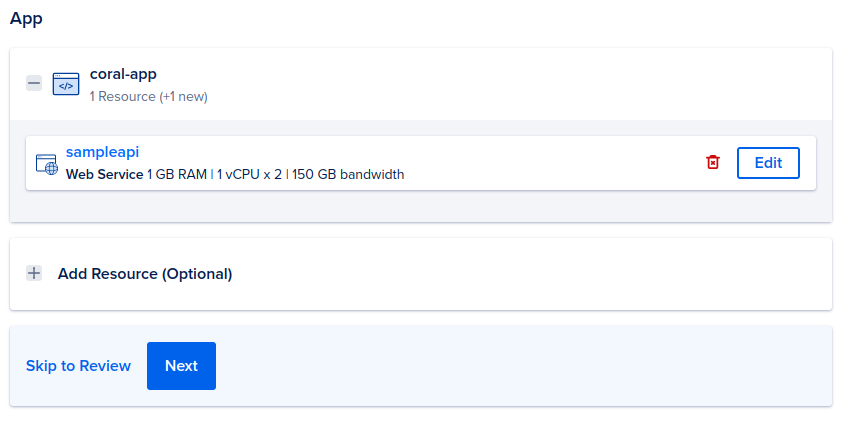
Figure 13.43: DigitalOcean - Reviewing the virtual server specification.
A second option is then shown to add any environment variables if they are required, as shown in Figure 13.44. As none are needed in this example, click Next to continue.
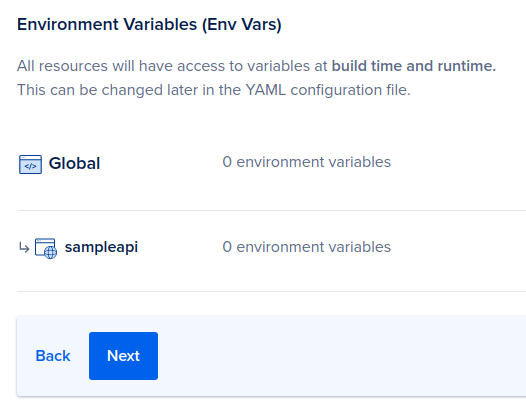
Figure 13.44: DigitalOcean - Reviewing environment variables.
We will then see the region where the API server will be deployed, as shown in Figure 13.45. In this example, the API server will be hosted on a cloud platform in London. We typically try to locate the API server close to the location where your users are located. Click Next to continue.
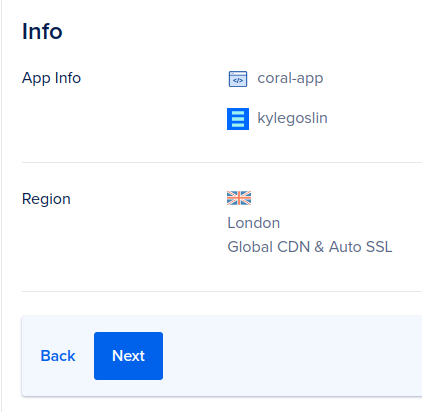
Figure 13.45: DigitalOcean - Reviewing the deployment country.
On the very last step, a summary of the deployment will be shown, outlining the settings and the monthly cost to deploy the virtual machine. If you wish to use a lower cost machine, we can simply click the Edit Button shown in Figure 13.46.
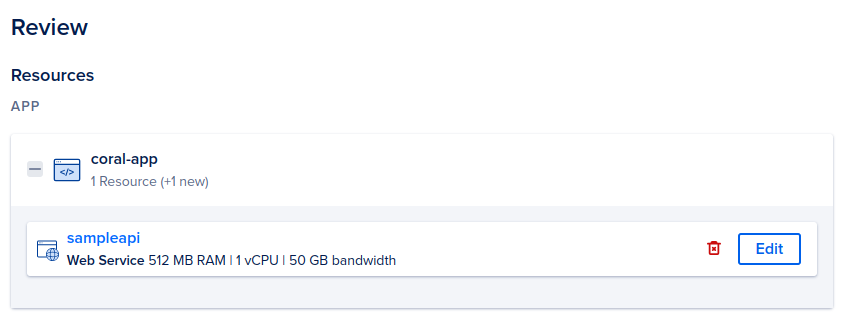
Figure 13.46: DigitalOcean - Reviewing deployment.
On the page that loads, as shown in Figure 13.47, a drop-down menu is shown that allows you to select the monthly cost of the virtual machine you are going to deploy. Typically, the higher the cost per month, the more computing power is given to the instance. For this example, we will select a low-cost instance. To do this, for the Instance size, we will select the five-dollar-a-month instance and then click Save.
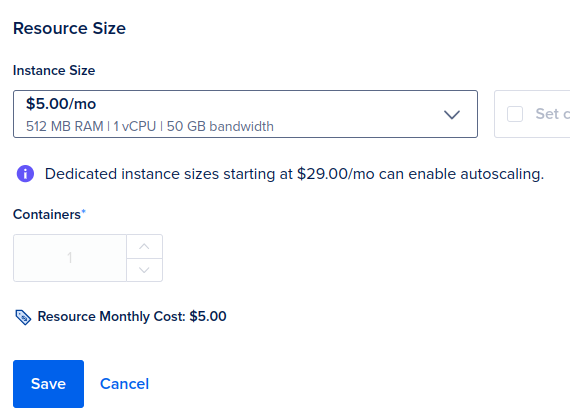
Figure 13.47: DigitalOcean - Editing the instance size.
At the very end of this process, a summary is then shown which outlines the instance size that will be created and the total monthly cost associated with it. To start the deployment process, click the button titled Create resource as shown in Figure 13.48.
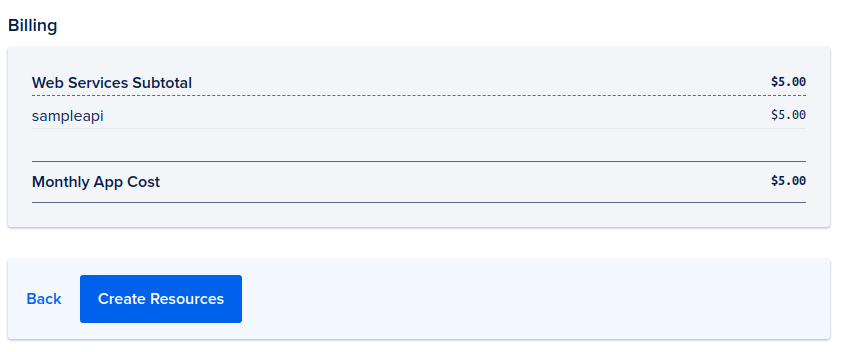
Figure 13.48: DigitalOcean - Summary showing the instance size and cost per month.
Once you have created the deployment server, the deployment process may take a few minutes to complete. During this process, a new virtual server is created, and the code from the GitHub repository we created earlier is pulled and placed on the new server. When this process is finished, the live URL for your API server will then become available. To view the live API server, click Live App as shown in Figure 13.49.
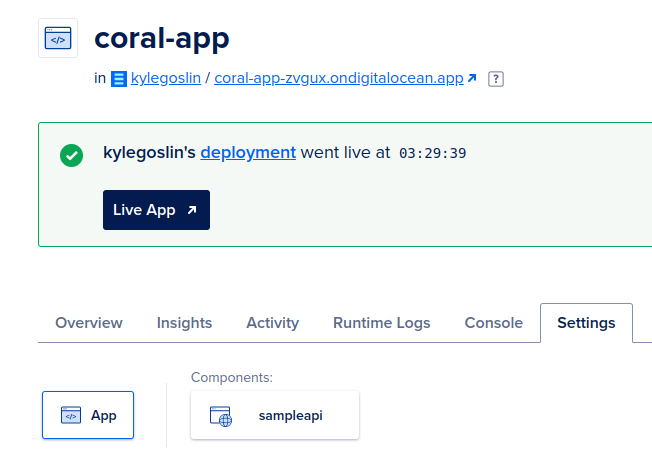
Figure 13.49: DigitalOcean - Deployment success page.
For the newly deployed server, a URL is generated similar to the one shown below:
https://coral-app-zvgux.ondigitalocean.app/
When this URL is called in a browser, the default homepage for the Express.js API server is visible, as shown in Figure 13.50.
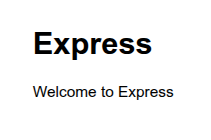
Figure 13.50: DigitalOcean - Express.js homepage shown when the server URL is called.
When using the API server locally, we used the address localhost:3000/api/. As the code is now on the cloud server, the new URL is shown below. During development, port 3000 was used. When the server is deployed, the port number is automatically changed to port 80 and does not need to be appended to the URL.
https://coral-app-zvgux.ondigitalocean.app/api/
When this URL is opened in a web browser, the default message that is returned from our API server when the /api/ URL is called can be seen:
The API was called!
On this API server, one additional route was added titled /api/getData. We can add this URL to the end of our newly deployed API server URL, as shown below:
https://coral-app-zvgux.ondigitalocean.app/api/getData
When the page loads, the JSON from the cloud database is output to the user as shown below:
{
    "_id": "68aef82a1ccf10dcba0c5830",
    "email": "[email protected]",
    "pass": "test"
}
In the event that something goes wrong, and we do not get the output we expect when we call the desired URL, we can head back to the DigitalOcean dashboard for our application, as shown in Figure 13.51. Here, a tab titled logs is available that outputs a console similar to what we would have if we were running the application locally. This can be very useful for debugging issues in your live application.
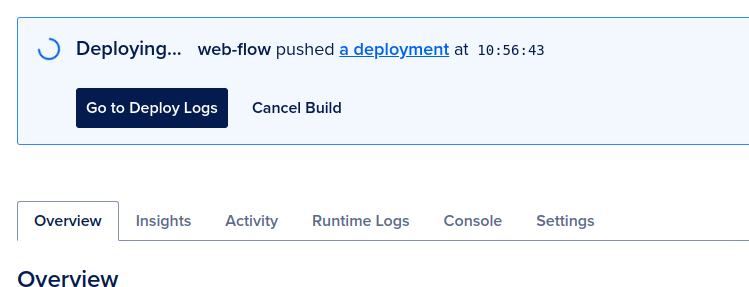
Figure 13.51: DigitalOcean - Hosted server dashboard.
13.8 Packaging Your Extension
Once an extension has been developed, the last step in the process is to package the extension itself. This packing process converts the extension folder containing the individual files into a single .crx file. To create this single file, open your browser and head to chrome://extensions/. On the top left corner, click Pack extension as shown in Figure 13.52.

Figure 13.52: Chrome extension dashboard.
A dialog will then open as shown in Figure 13.53. In this dialog, select the folder where your extension code is located. This folder should contain the manifest.json file. In this example, the sample extension folder titled ai-extension from Chapter 11 is used. Once located, click Pack extension to finish.

Figure 13.53: Packing - Selecting the extension folder to pack.
Once complete, a summary will be shown outlining the files that have been created, as shown in Figure 13.54.

Figure 13.54: Packing - Summary of files created.
In the folder where the extension is located, two new files will be visible. The first is titled ai-extension.crx, which is the packaged extension, and ai-extension.pem, a cryptographic key for the extension, as shown in Figure 13.55.

Figure 13.55: Packing - Folder containing the new single .crx file.
Although this .crx file is useful to move an extension from one location to another; it cannot be uploaded to the Chrome Web Store for listing. For this, a simple .zip file of the folder is sufficient. To allow other users to download your extension from the official web store, the Chrome Web Store Developer Console can be used. (https://chrome.google.com/webstore/devconsole)
13.9 Summary
To complete the development process, this chapter outlined the process of updating a locally developed extension to utilize a cloud-hosted API server and cloud database. To do this, the process of configuring the MongoDB Atlas cloud database was first described. To test the database, the MongoDB Compass client was then described, allowing us to ensure access to the cloud database was possible. As specific records in the local database may be required in the cloud database, the process of migrating JSON records was then described.
To host the locally developed API server in the cloud, the DigitalOcean App Platform was then described. To provide a source for this hosted API, the steps involved in using GitHub Desktop to manage the code were then described. Finally, to allow other users to use a developed extension, this chapter concluded by outlining the steps involved in creating a single .crx file.
Take-away Tips:
-
When working with a cloud database, use a separate client tool first to connect to the database, such as MongoDB Compass, as it allows you to test the connection, username, and password all at the same time before integrating the new URL into your API server. If the client tool cannot connect, then your extension will not be able to connect.
-
During testing, add 0.0.0.0/0 to your cloud database access whitelist, allowing all incoming connections to the database to be accepted. This can always be restricted after testing.
-
Although it is possible to build an entire virtual machine to host an API server, such as a DigitalOcean Droplet, the same functionality can be achieved rapidly with the DigitalOcean App Platform.
-
To deploy an API server to the DigitalOcean App Platform, the code should first be added to a git repository, which is then used as the source for the deployment.
-
Most API server hosting solutions, such as the App Platform, allow for automatic redeployment when a change is identified on the git repository, such as a recent commit.
-
When an extension has been developed, to provide it to other users as a single, .crx file can be created from the chrome://extensions dashboard.